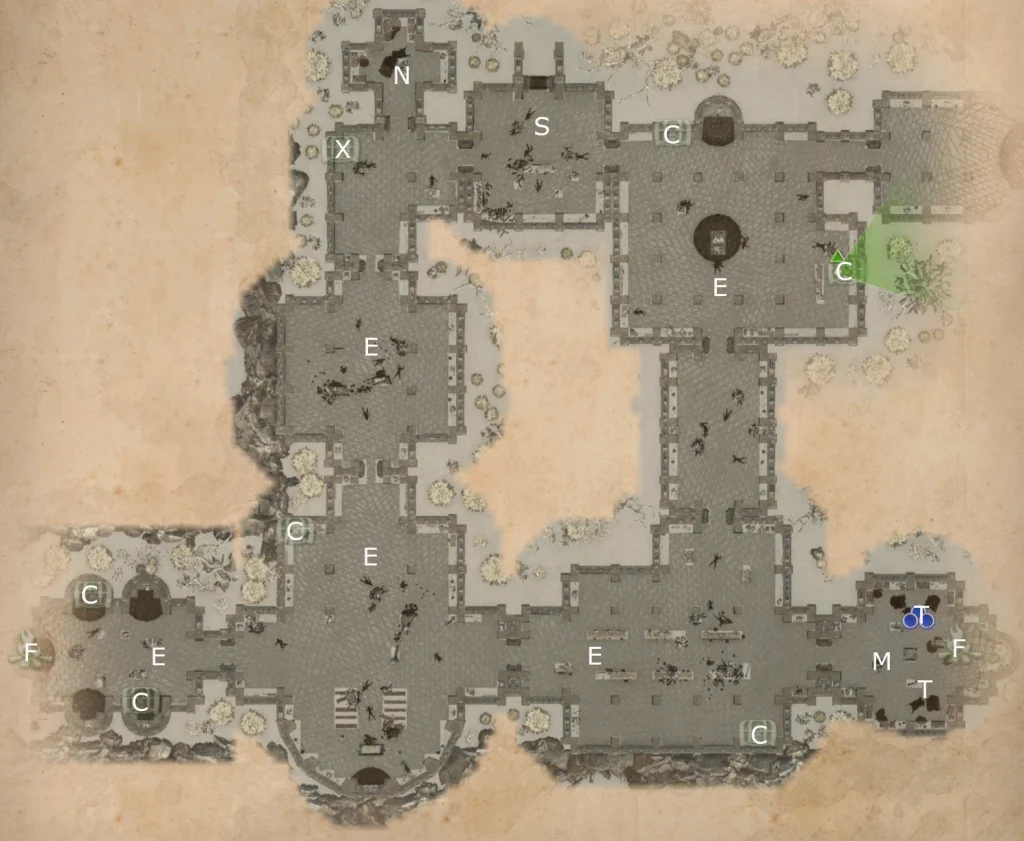
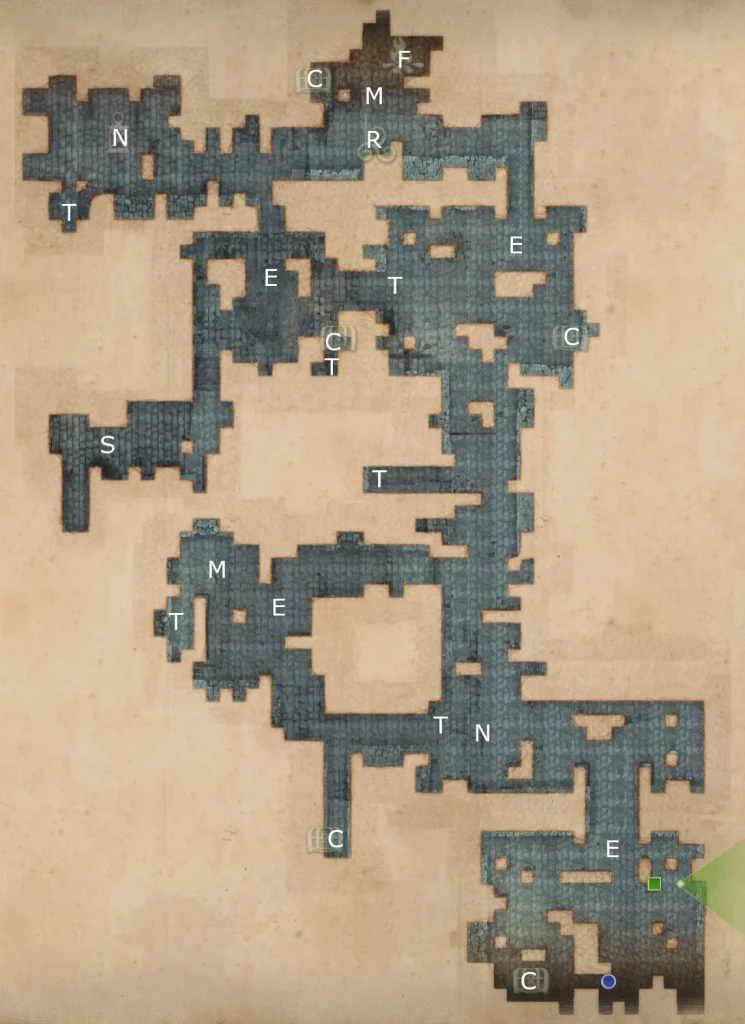
Screenshot by Mike Olgren from King Arthur Knight’s Tale The Reckoning with Galahad map.
B = battle (between two other groups) C = chest E = encounter F = campfire H = hero J1 = jump to J2 K = locked door (needs key) M = point of interest N = optional battle P = traps R = shrine S = start T = treasure pile X = hidden treasure
M is Castellan Drucas (arcanist) who can join Mission.
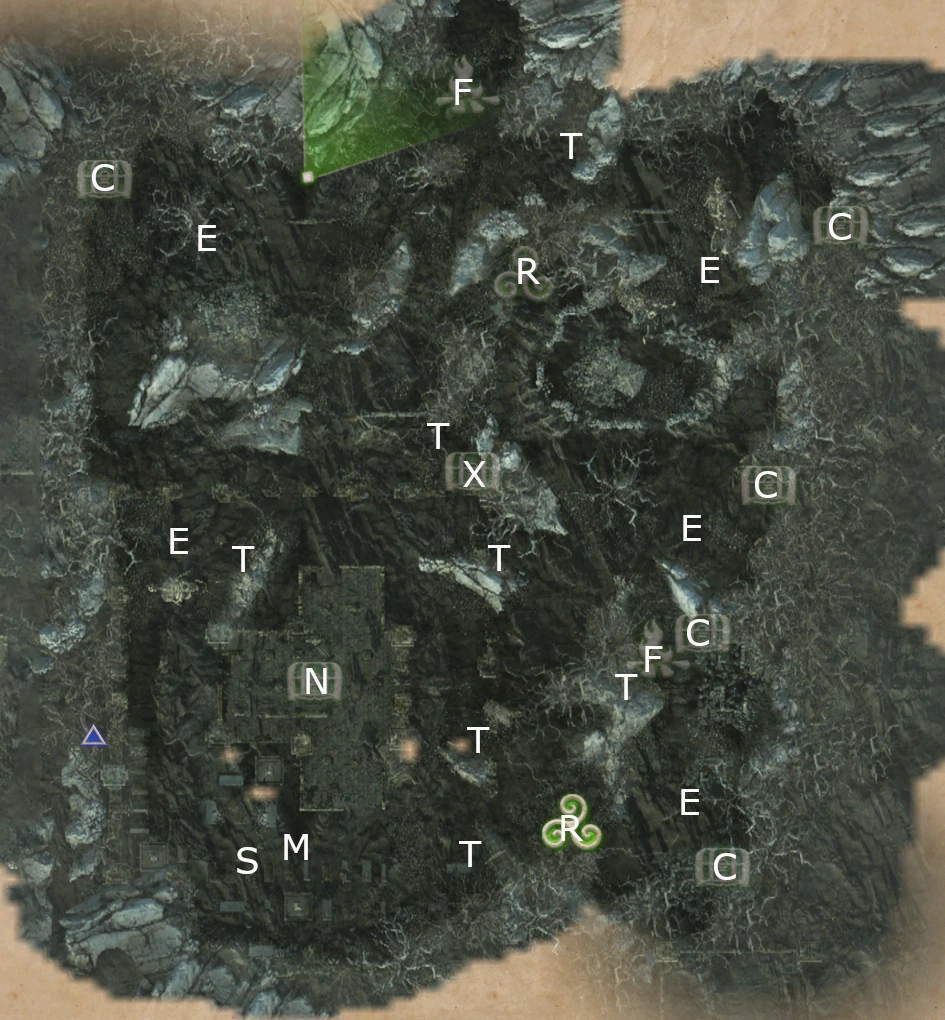
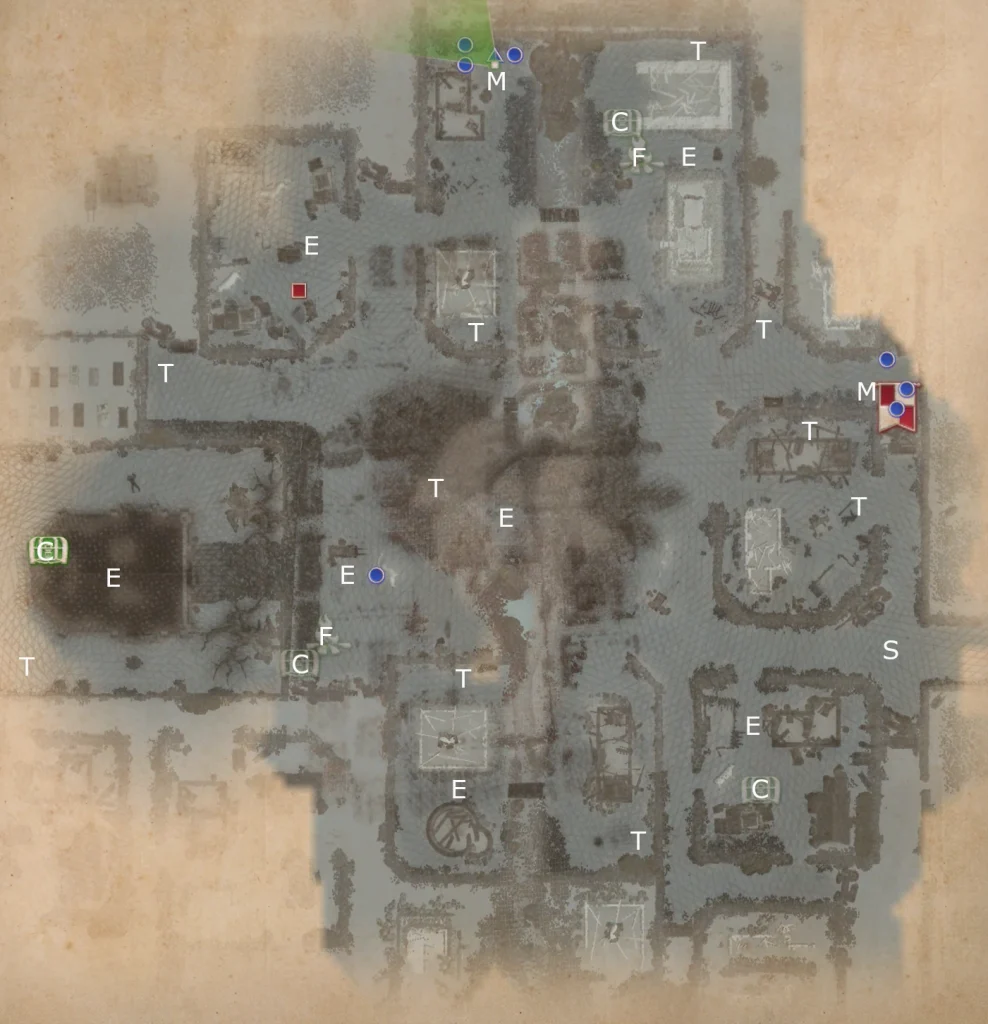
Screenshot by Mike Olgren from King Arthur Knight’s Tale Balor’s Champion map.
B = battle (between two other groups) C = chest E = encounter F = campfire H = hero J1 = jump to J2 K = locked door (needs key) M = point of interest N = optional battle P = traps R = shrine S = start T = treasure pile X = hidden treasure
M is Gwendolyn (arcanist) who joins for the Mission.
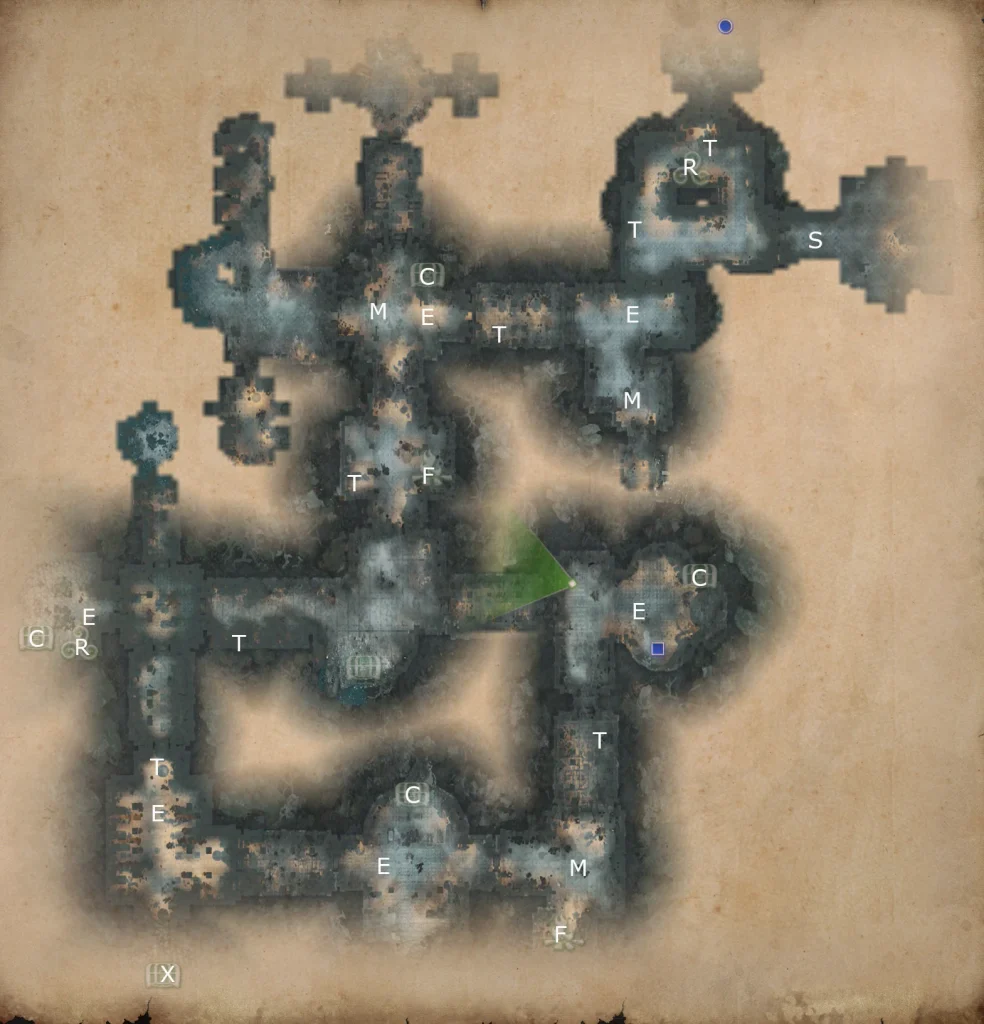
Screenshot by Mike Olgren from King Arthur Knight’s Tale Blackened Heart map.
B = battle (between two other groups) C = chest E = encounter F = campfire H = hero J1 = jump to J2 K = locked door (needs key) M = point of interest N = optional battle P = traps R = shrine S = start T = treasure pile X = hidden treasure
M in northwest corner is Sir Eldric who joins for the Mission.
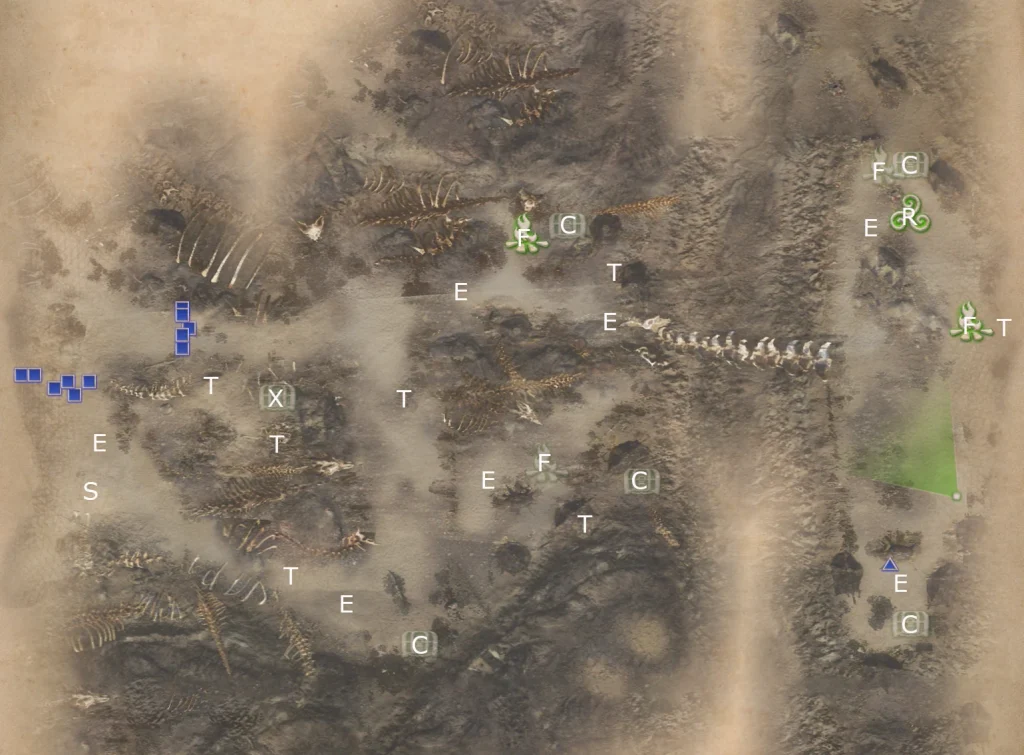
Screenshot by Mike Olgren from King Arthur Knight’s Tale The Gathering map.
B = battle (between two other groups) C = chest E = encounter F = campfire H = hero J1 = jump to J2 K = locked door (needs key) M = point of interest N = optional battle P = traps R = shrine S = start T = treasure pile X = hidden treasure
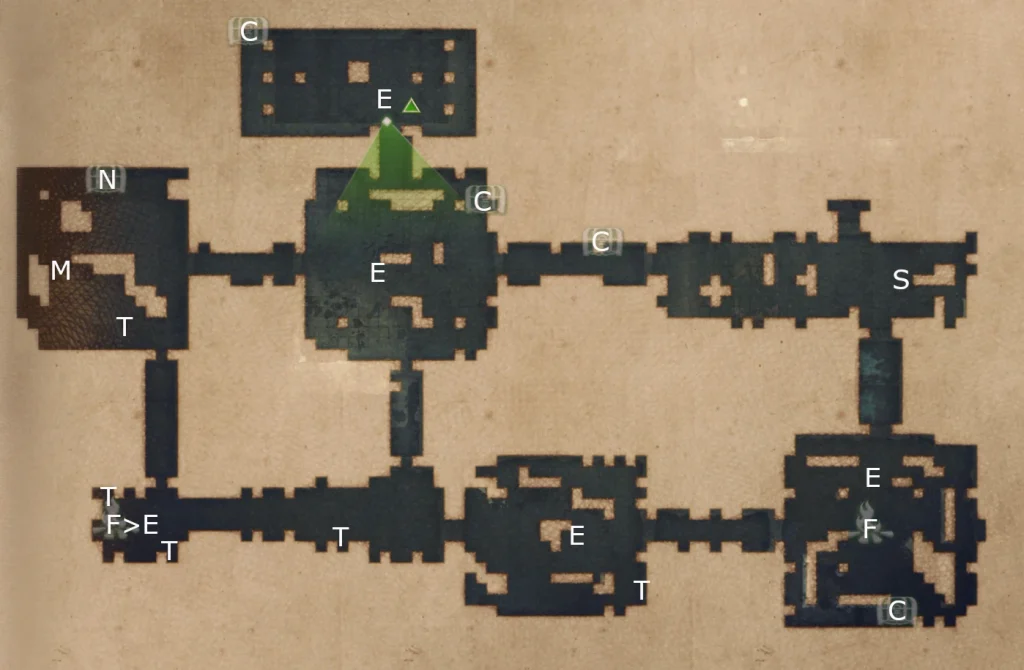
Screenshot by Mike Olgren from King Arthur Knight’s Tale Crypt of the White Knight map.
B = battle (between two other groups) C = chest E = encounter F = campfire H = hero J1 = jump to J2 K = locked door (needs key) M = point of interest N = optional battle P = traps R = shrine S = start T = treasure pile X = hidden treasure
M in southeast corner is a Blackthorn Ranger (vanguard) who can join for the Mission.
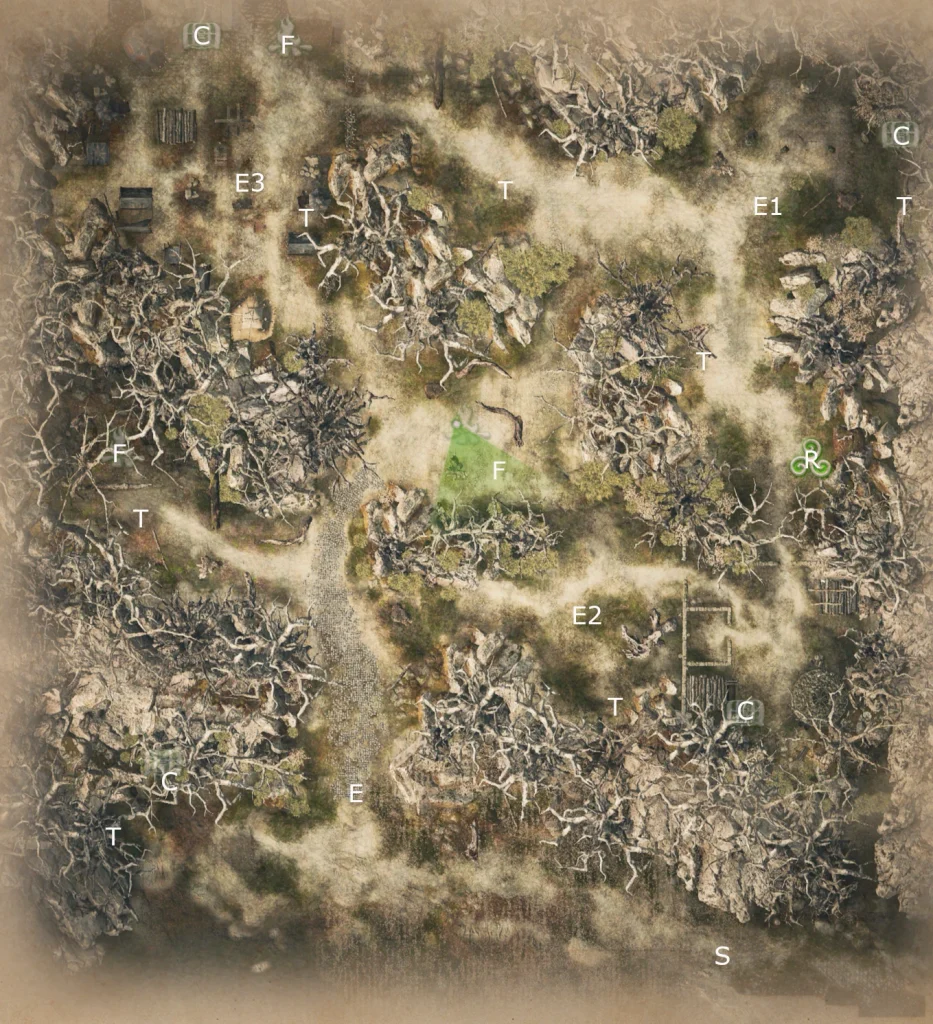
Screenshot by Mike Olgren from King Arthur Knight’s Tale The Knight in Red map.
B = battle (between two other groups) C = chest E = encounter F = campfire H = hero J1 = jump to J2 K = locked door (needs key) M = point of interest N = optional battle P = traps R = shrine S = start T = treasure pile X = hidden treasure
This Mission was difficult for me. I was not able to complete the optional quest because my party was too beat up (you can see the flag on the map above).
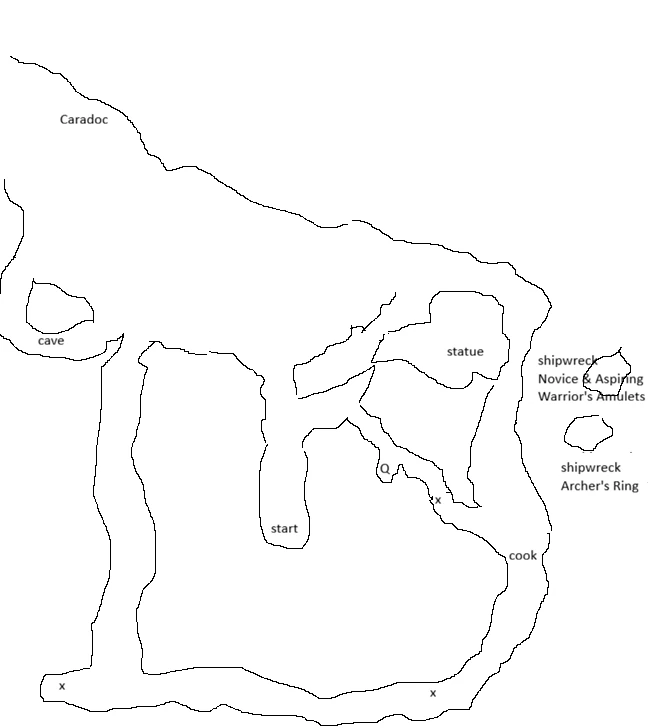
I could not find a good map of the prologue to Tainted Grail: Fall of Avalon, so I created one! Below is a map of the beach (second) part of the prologue. SPOILER ALERT: I have labeled locations of the missable items. The map exit is at Caradoc, from where you will exit the prologue. The dungeon portion of the prologue is on a separate post.
Map of the beach portion of the prologue to Tainted Grail: Fall of Avalon, created by Mike Olgren.
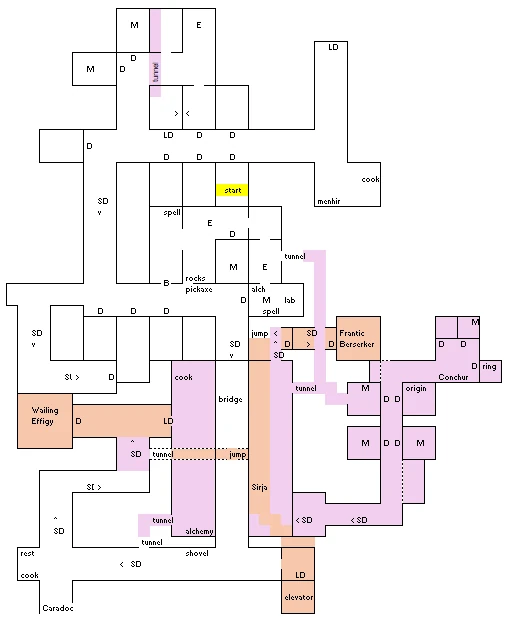
I could not find a good map of the prologue to Tainted Grail: Fall of Avalon, so I created one! Below is a map of the dungeon (first) part of the prologue. SPOILER ALERT: I have labeled locations of the missable items. The map exit is at Caradoc, where the remaining path of the dungeon is on rails. The beach portion of the prologue will be on a separate page.
Map of the dungeon portion of the prologue to Tainted Grail: Fall of Avalon, created by Mike Olgren.
This map shows 3 superimposed layers. 1st level is white background, 2nd level (down) is purple, bottom level is brown. The scaling is not perfect.
Screenshot by Mike Olgren from King Arthur Knight’s Tale The Hidden Stronghold.
B = battle (between two other groups) C = chest E = encounter F = campfire H = hero J1 = jump to J2 K = locked door (needs key) M = point of interest N = optional battle P = traps R = shrine S = start T = treasure pile X = hidden treasure
Belisar (arcanist) joins at the start of the mission. “F>E” means an ambush encounter after you rest.
Screenshot by Mike Olgren from King Arthur Knight’s Tale Bad Omens.
B = battle (between two other groups) C = chest E = encounter F = campfire H = hero J1 = jump to J2 K = locked door (needs key) M = point of interest N = optional battle P = traps R = shrine S = start T = treasure pile X = hidden treasure