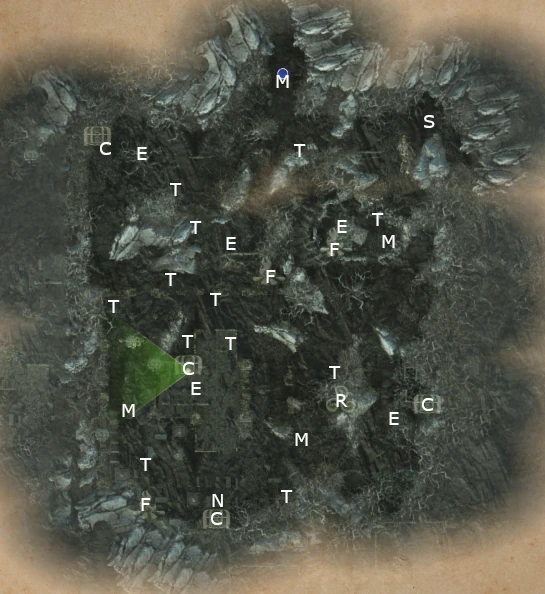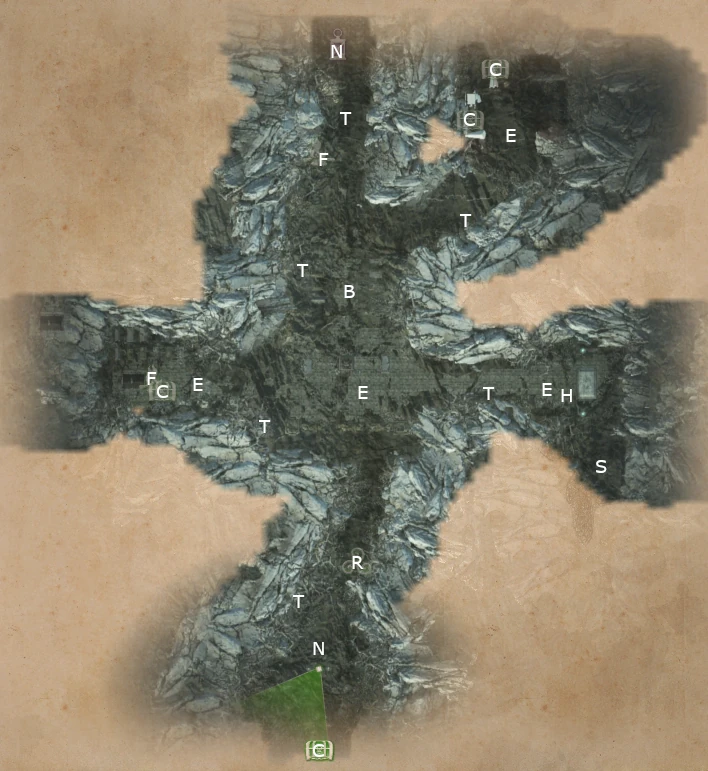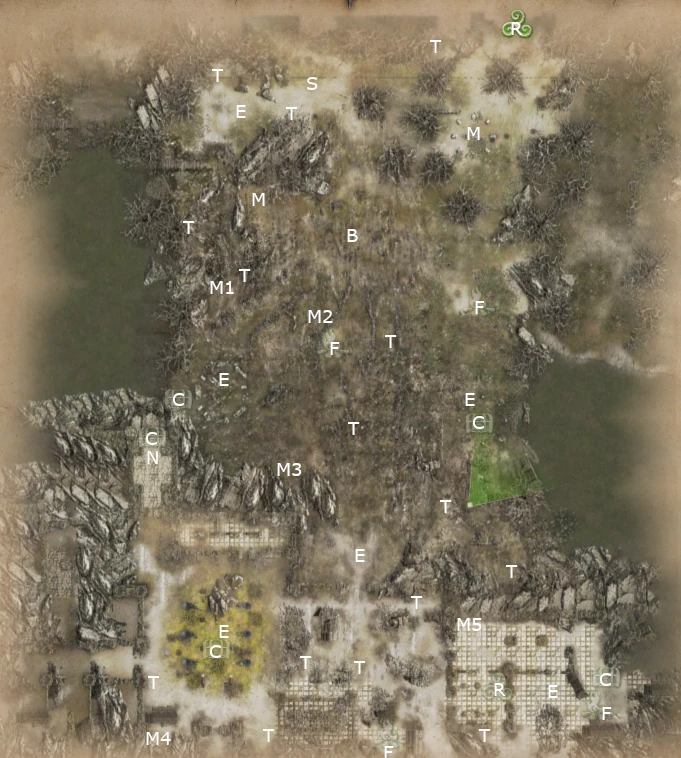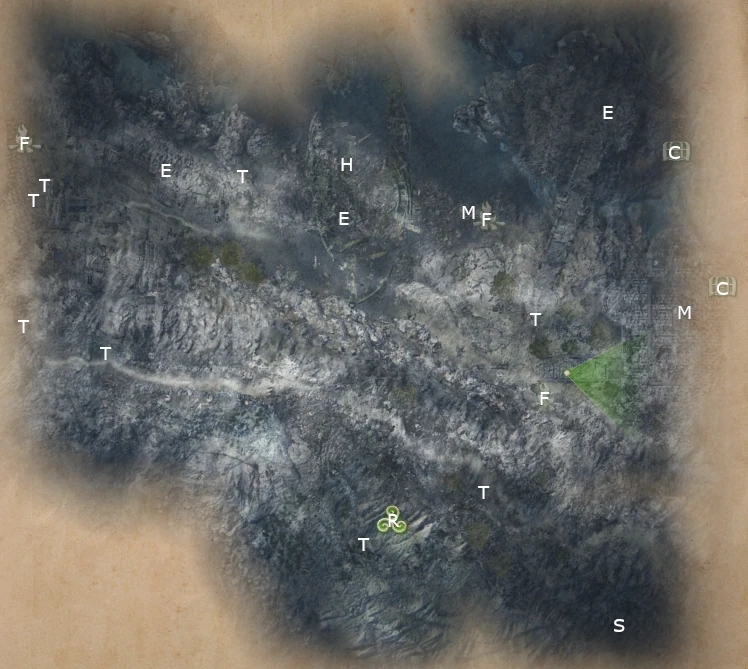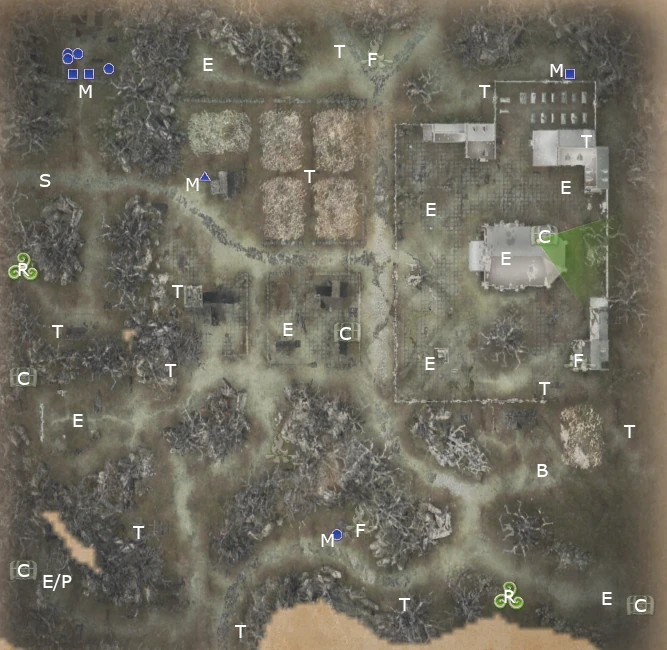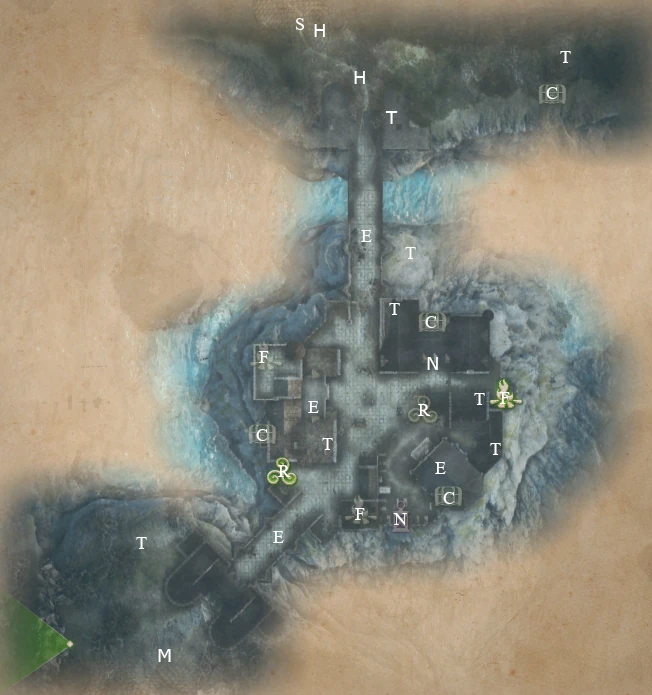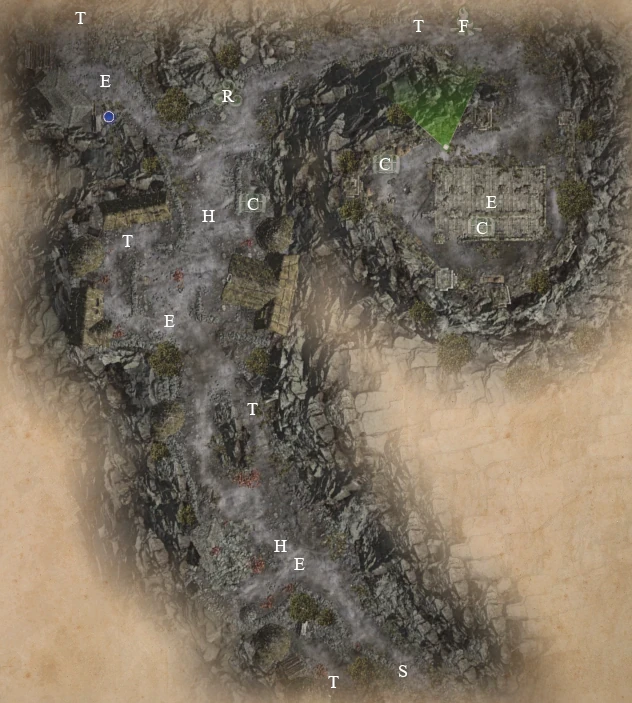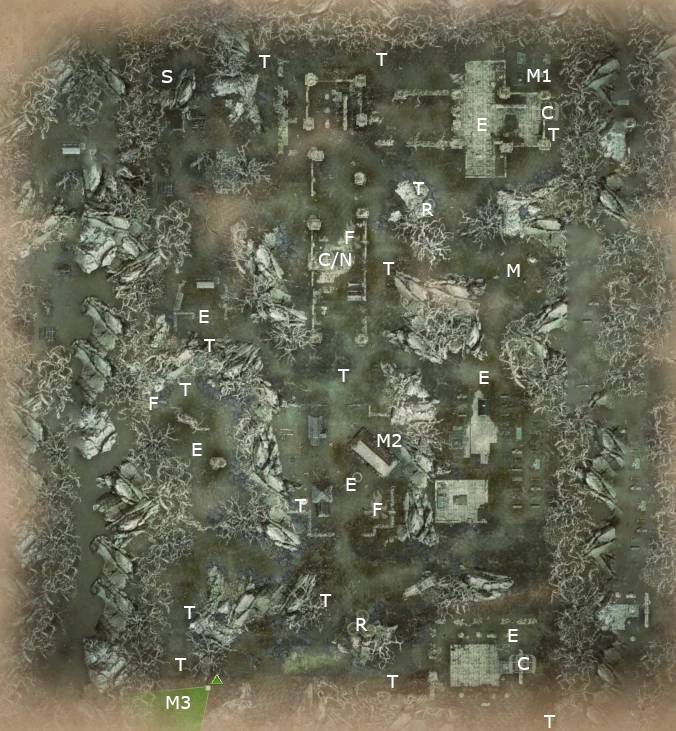
B = battle (between two other groups)
C = chest
E = encounter
F = campfire
H = hero
J1 = jump to J2
K = locked door (needs key)
M = point of interest
N = optional battle
P = traps
R = shrine
S = start
T = treasure pile
X = hidden treasure
Final battle (south) is tough.
Return to King Arthur Knight’s Tale maps