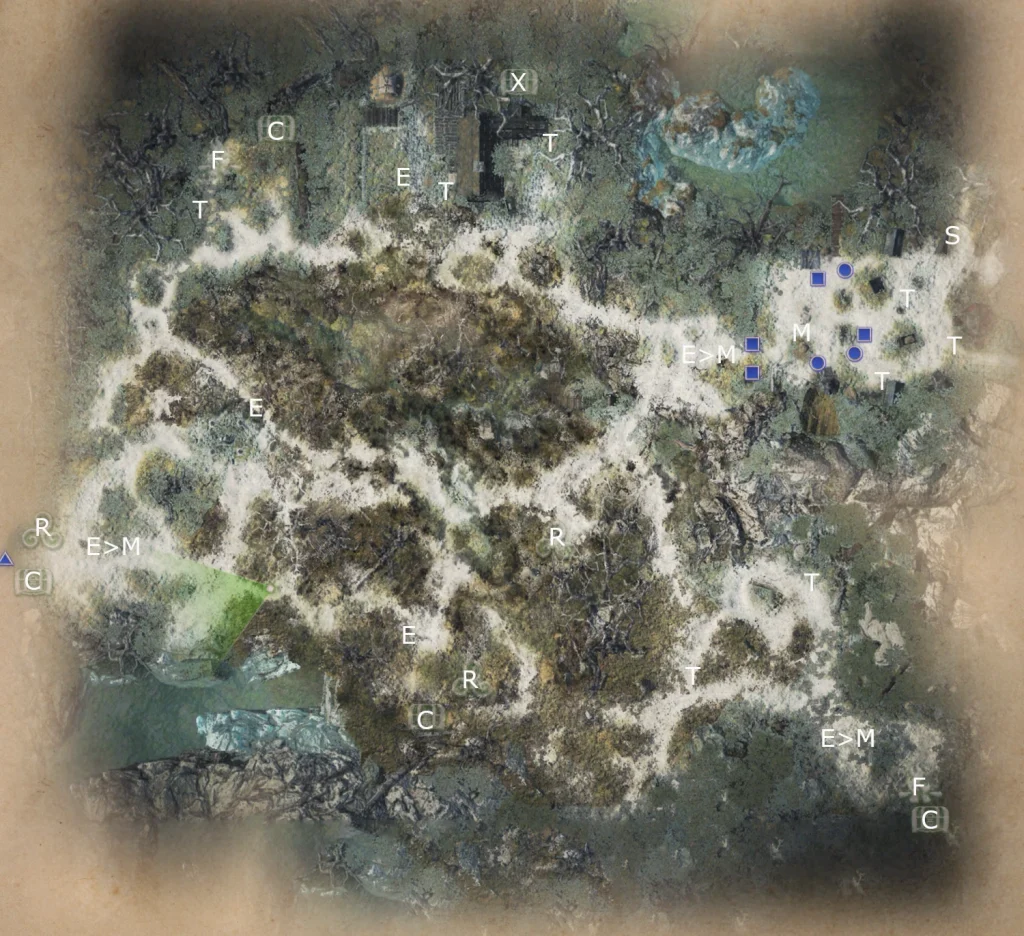
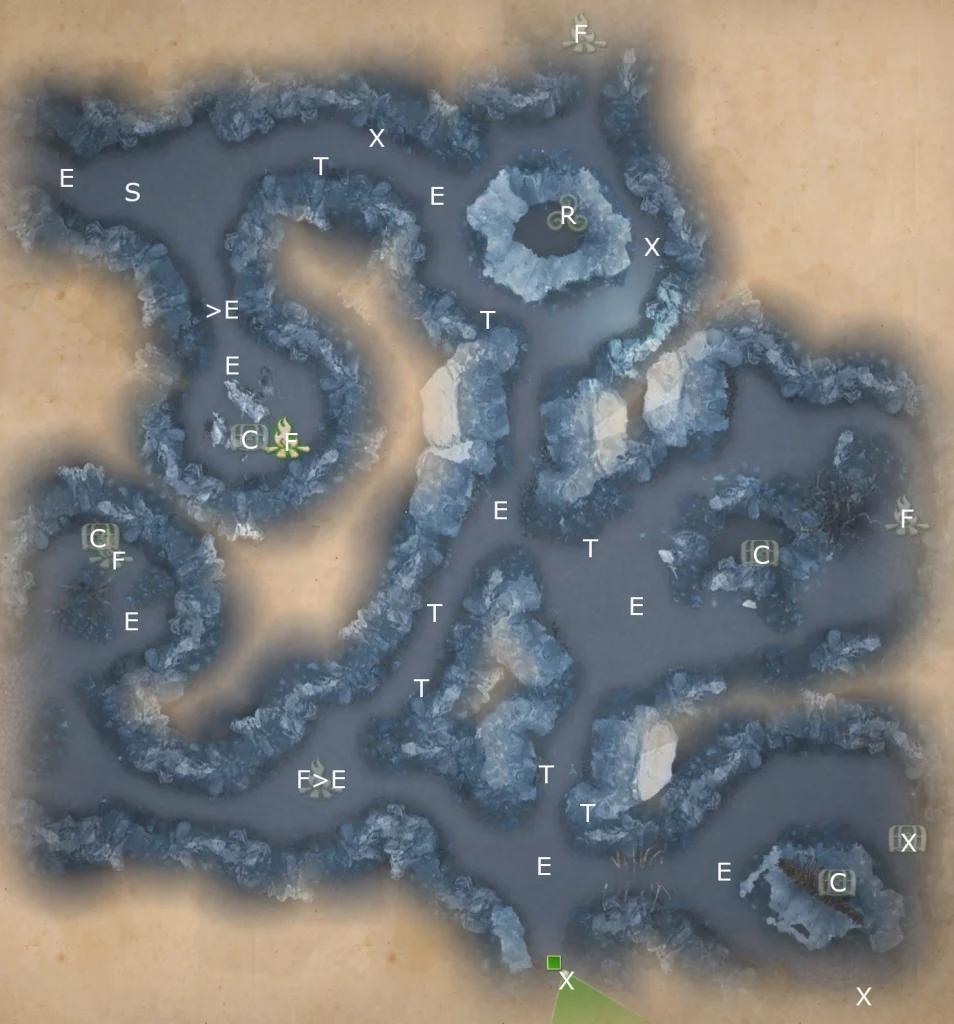
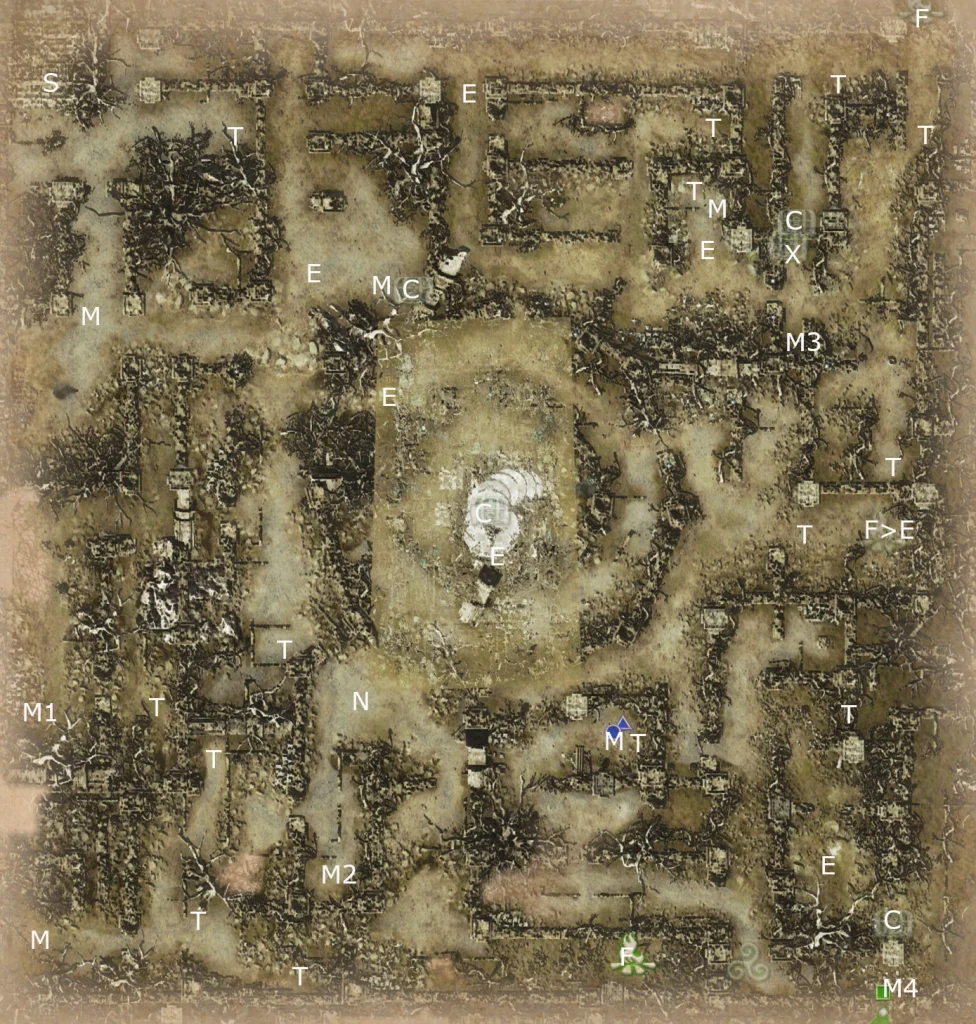
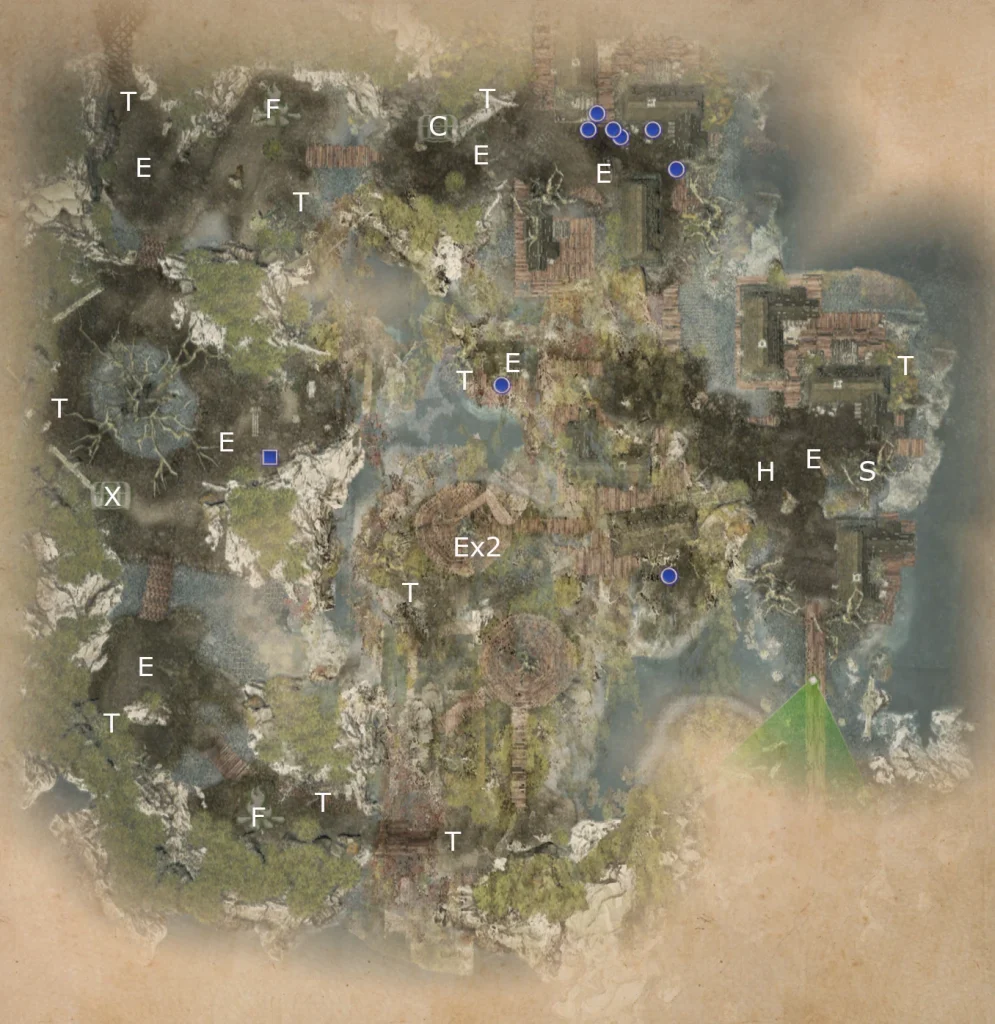
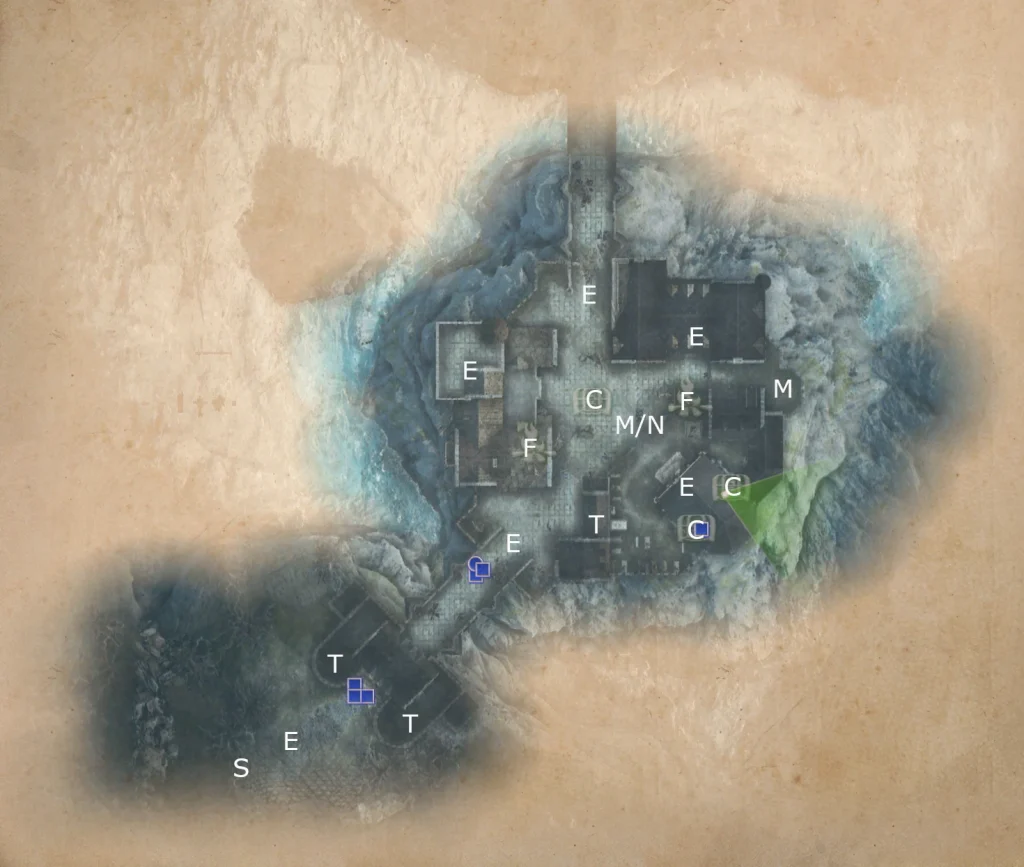
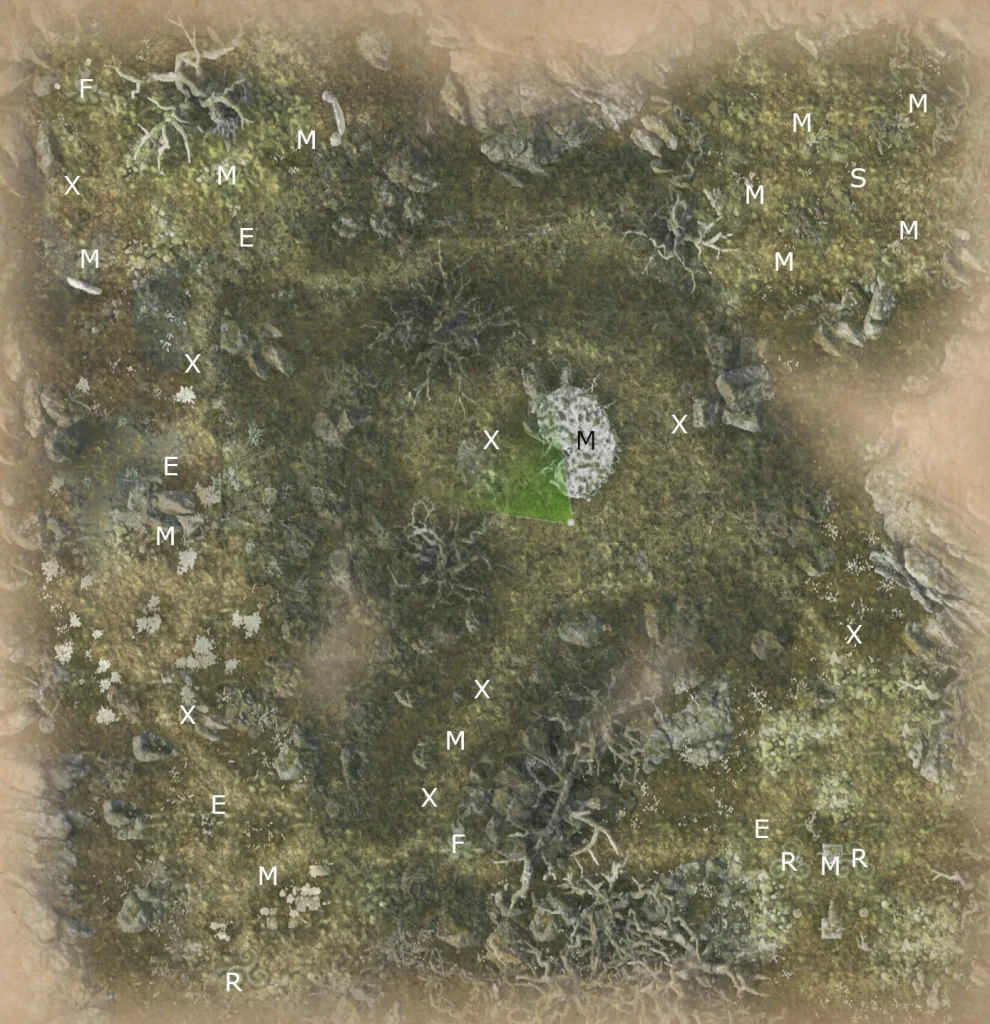
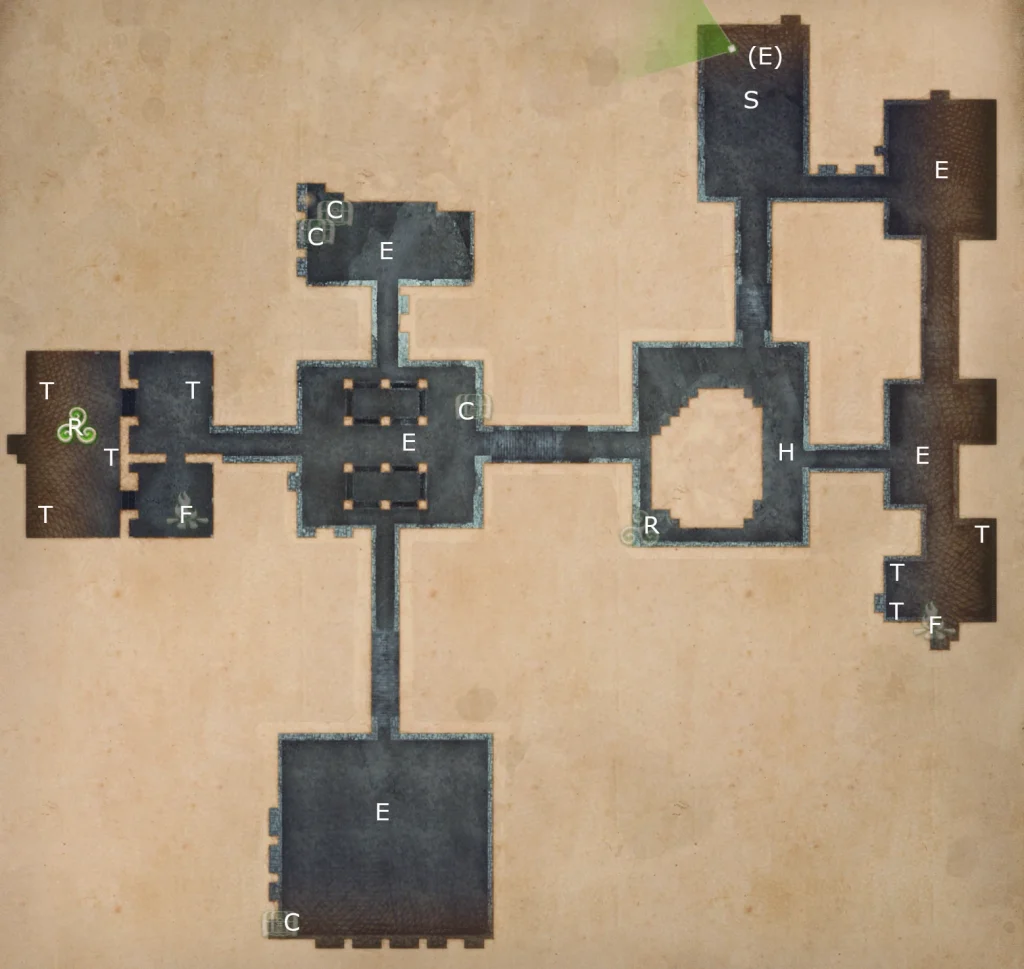
Screenshot by Mike Olgren from King Arthur Knight’s Tale The Beastmaster map.
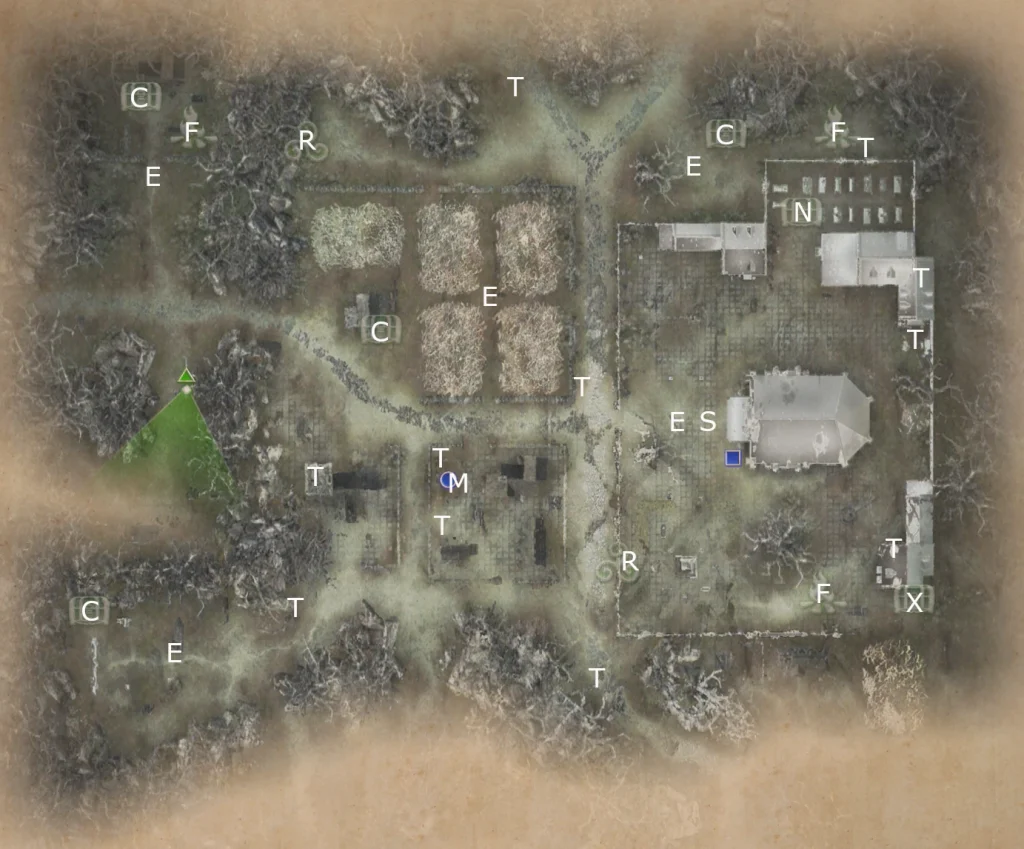
B = battle (between two other groups) C = chest E = encounter F = campfire H = hero J1 = jump to J2 K = locked door (needs key) M = point of interest N = optional battle P = traps R = shrine S = start T = treasure pile X = hidden treasure
M in the northeast gives option to advance Tyrant or Rightful.
Screenshot by Mike Olgren from King Arthur Knight’s Tale The Wild Hunt Returns map.
B = battle (between two other groups) C = chest E = encounter F = campfire H = hero J1 = jump to J2 K = locked door (needs key) M = point of interest N = optional battle P = traps R = shrine S = start T = treasure pile X = hidden treasure
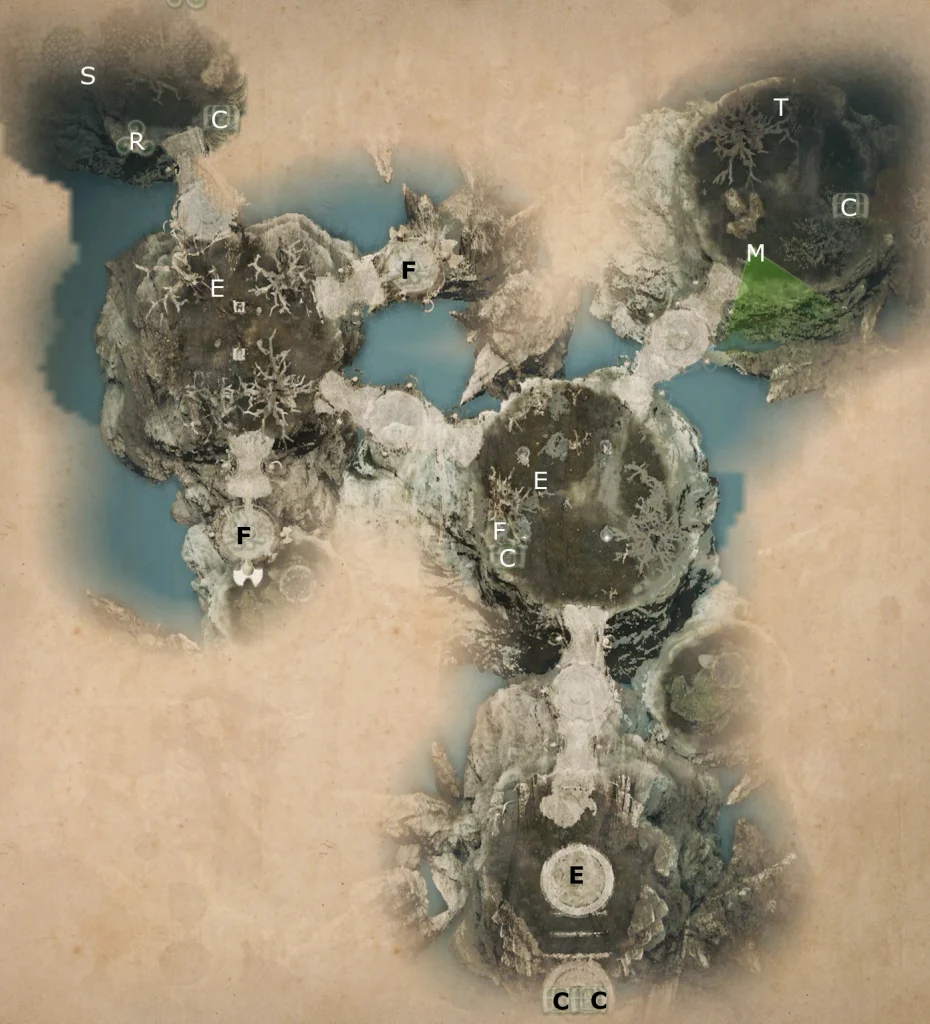
Screenshot by Mike Olgren from King Arthur Knight’s Tale Heart of the Deepwood map.
B = battle (between two other groups) C = chest E = encounter F = campfire H = hero J1 = jump to J2 K = locked door (needs key) M = point of interest N = optional battle P = traps R = shrine S = start T = treasure pile X = hidden treasure
At the start you have the option to add Shiannan the Nightveil to your party.
The final battle (south) is difficult unless you know…
Click here to reveal spoiler
Have a tank preoccupy the Green Knight. Everyone else damages the sorcerer. Although he does not appear to take damage, damaging him damages the Green Knight. The sorcerer will eventually die along with the first version of the Green Knight. Now you just have to kill the heavily-armoured second incarnation of the Green Knight.
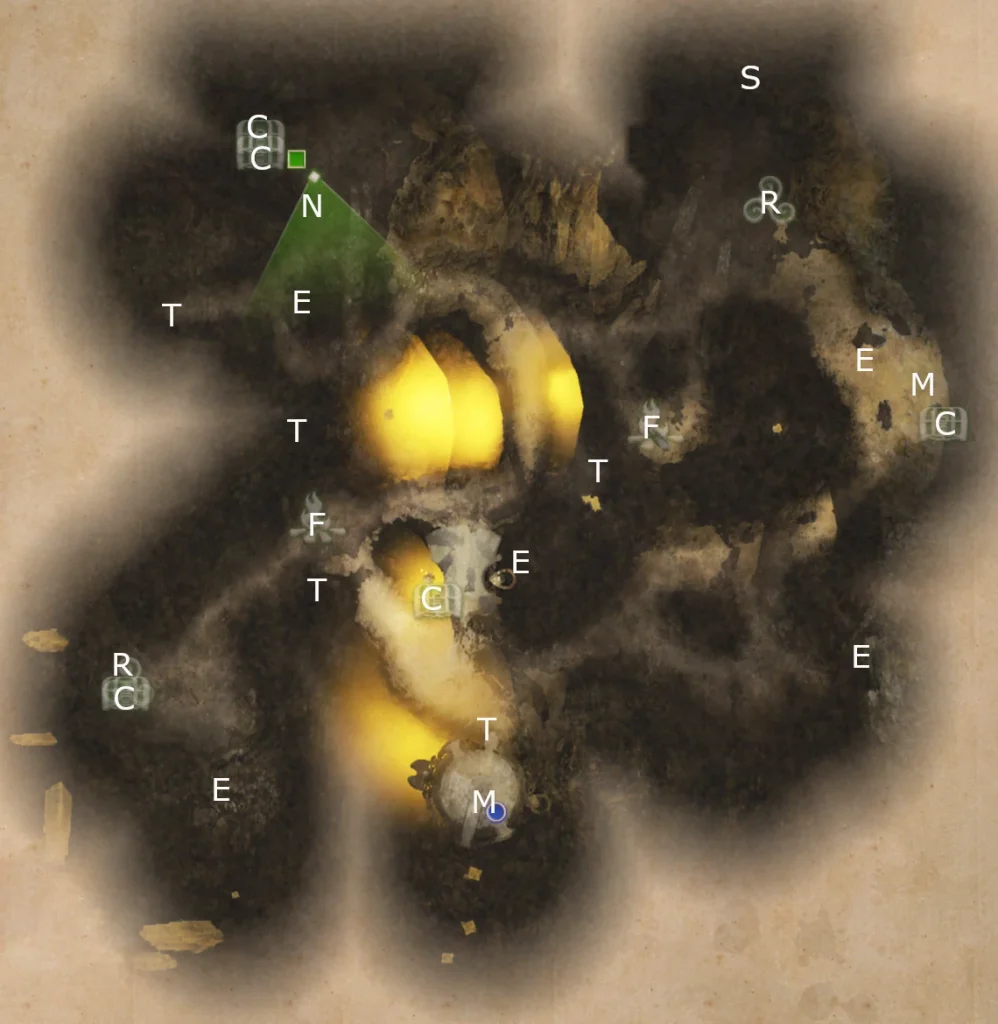
Screenshot by Mike Olgren from King Arthur Knight’s Tale The Artificer map.
B = battle (between two other groups) C = chest E = encounter F = campfire H = hero J1 = jump to J2 K = locked door (needs key) M = point of interest N = optional battle P = traps R = shrine S = start T = treasure pile X = hidden treasure
Spirit of the Artificer (arcanist) joins for the mission at upper right M.
Screenshot by Mike Olgren from King Arthur Knight’s Tale game.
B = battle (between two other groups) C = chest E = encounter F = campfire H = hero J1 = jump to J2 K = locked door (needs key) M = point of interest N = optional battle P = traps R = shrine S = start T = treasure pile X = hidden treasure
At the start, Icefang joins only for the mission.
F>E is a rest at a campfire that triggers a following encounter.
Screenshot by Mike Olgren from King Arthur Knight’s Tale Hunt of the Damned
B = battle (between two other groups) C = chest E = encounter F = campfire H = hero J1 = jump to J2 K = locked door (needs key) M = point of interest N = optional battle P = traps R = shrine S = start T = treasure pile X = hidden treasure
Sir Clawel joins only for mission at M, upper right of map.
Screenshot by Mike Olgren from King Arthur Knight’s Tale The Return of Morgana le Fay map.
B = battle (between two other groups) C = chest E = encounter F = campfire H = hero J1 = jump to J2 K = locked door (needs key) M = point of interest N = optional battle P = traps R = shrine S = start T = treasure pile X = hidden treasure
Hero is Morgana le Fay, who joins mission and then Round Table.
Screenshot by Mike Olgren from King Arthur Knight’s Tale The Battle of the Chasm map.
B = battle (between two other groups) C = chest E = encounter F = campfire H = hero J1 = jump to J2 K = locked door (needs key) M = point of interest N = optional battle P = traps R = shrine S = start T = treasure pile X = hidden treasure
Screenshot by Mike Olgren from King Arthur Knight’s Tale The Seelie Court
B = battle (between two other groups) C = chest E = encounter F = campfire H = hero J1 = jump to J2 K = locked door (needs key) M = point of interest N = optional battle P = traps R = shrine S = start T = treasure pile X = hidden treasure
Screenshot by Mike Olgren from King Arthur Knight’s Tale The Rite of the Ones Beneath.
B = battle (between two other groups) C = chest E = encounter F = campfire H = hero J1 = jump to J2 K = locked door (needs key) M = point of interest N = optional battle P = traps R = shrine S = start T = treasure pile X = hidden treasure
(E) is an encounter that happens at the end, as you leave. The hero is Sir Leodegrance, who joins you on the Mission and afterwards at the Round Table.