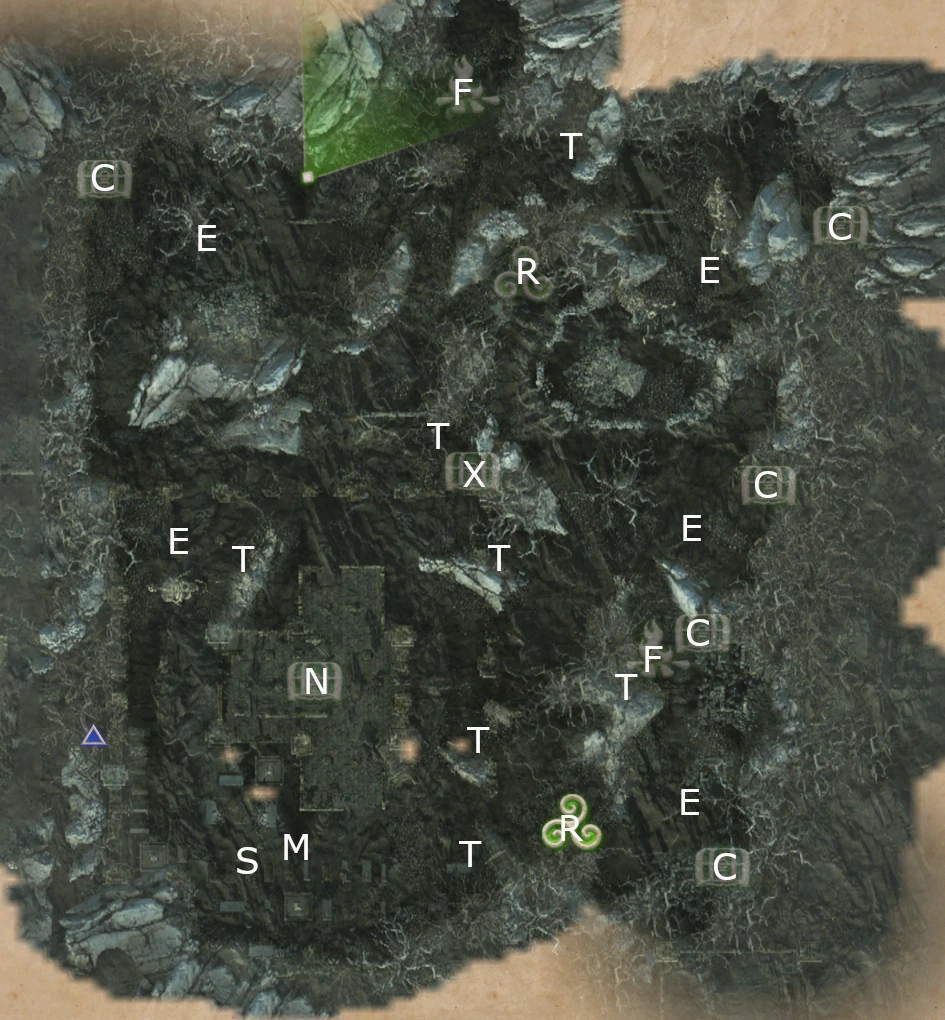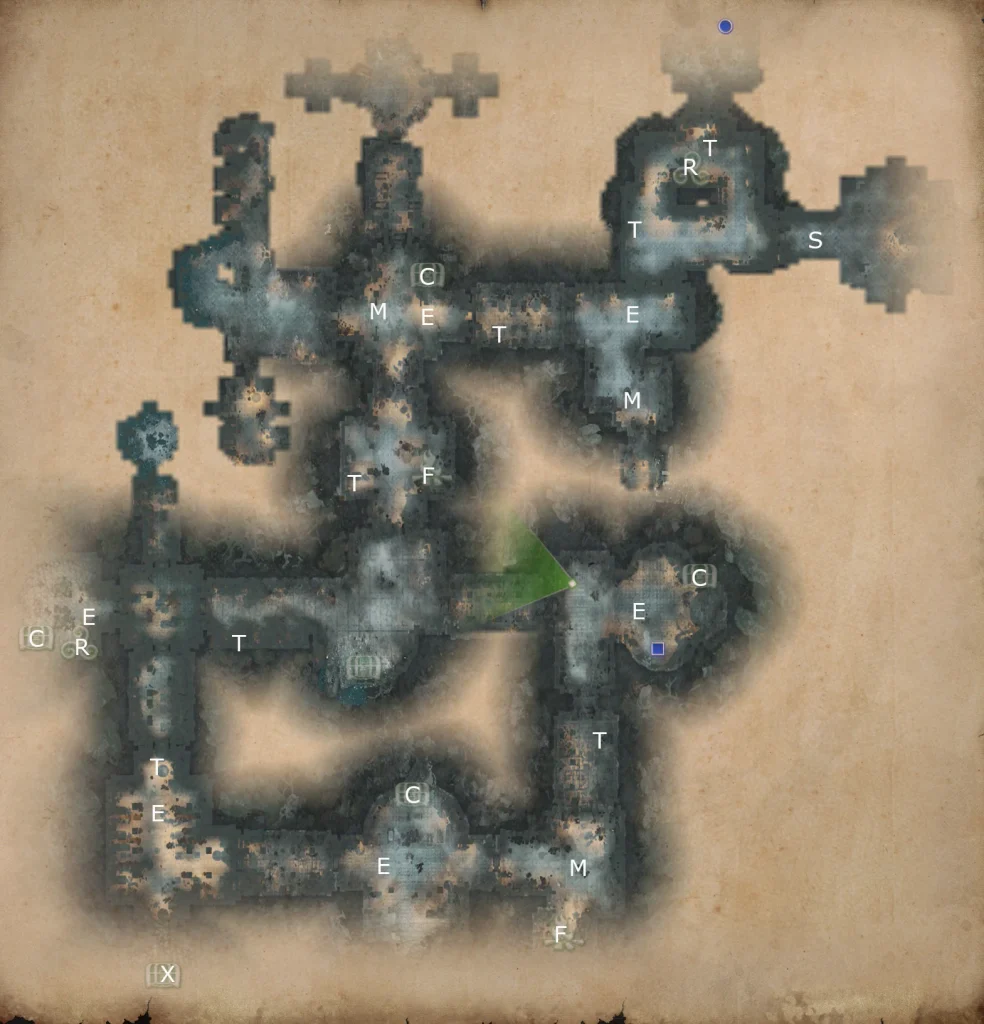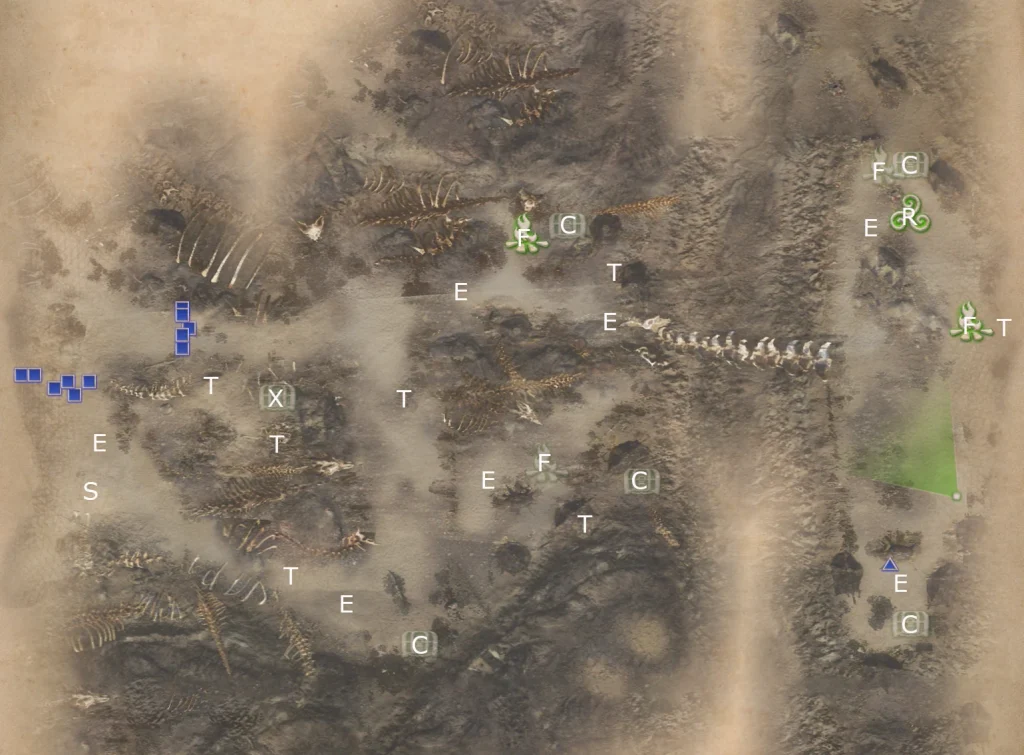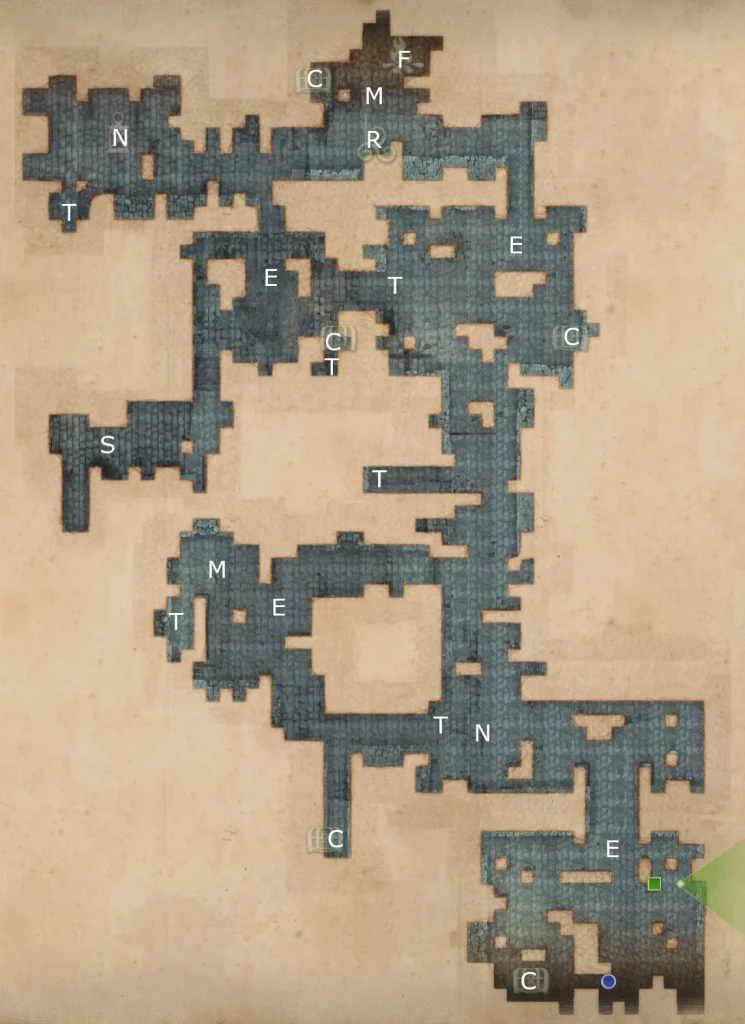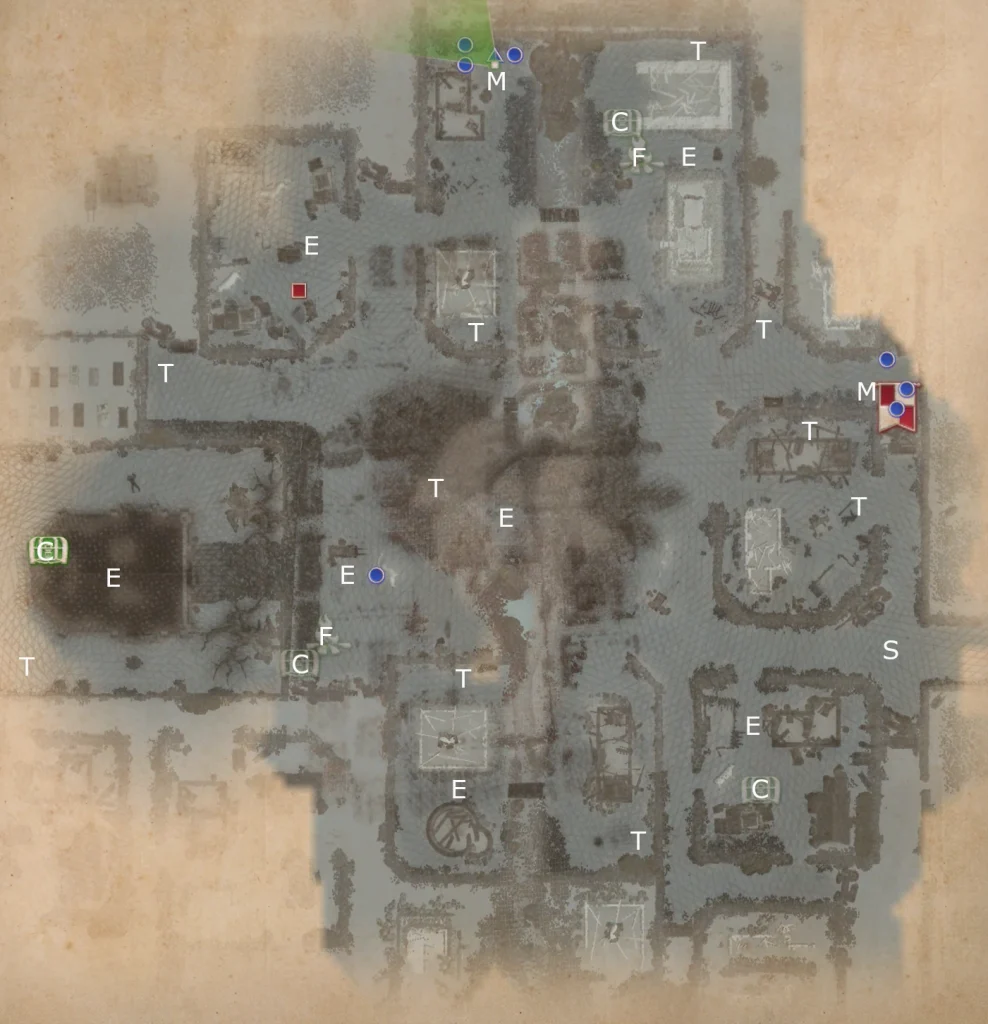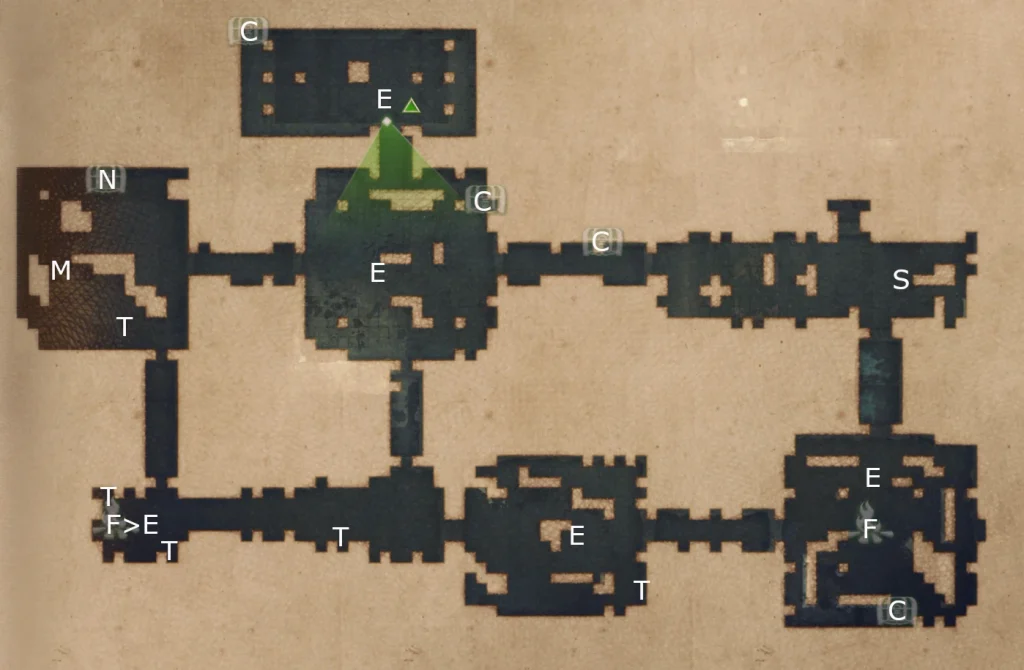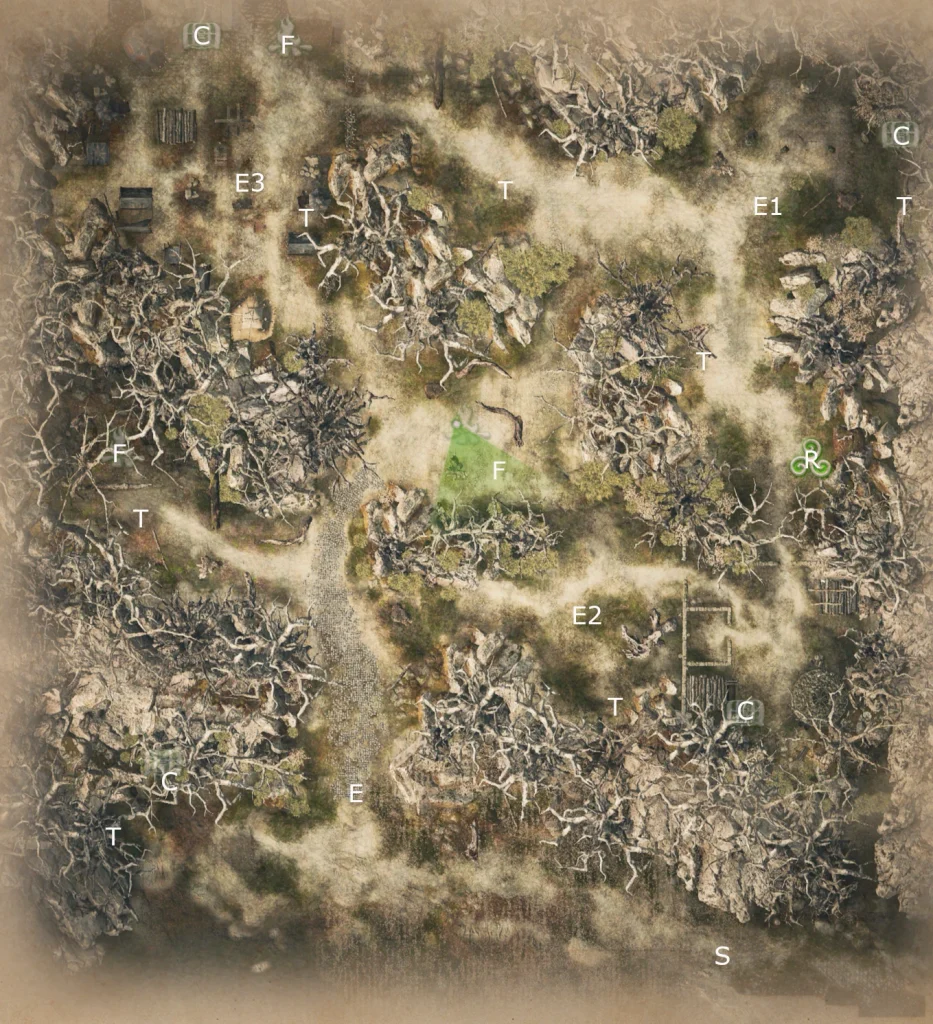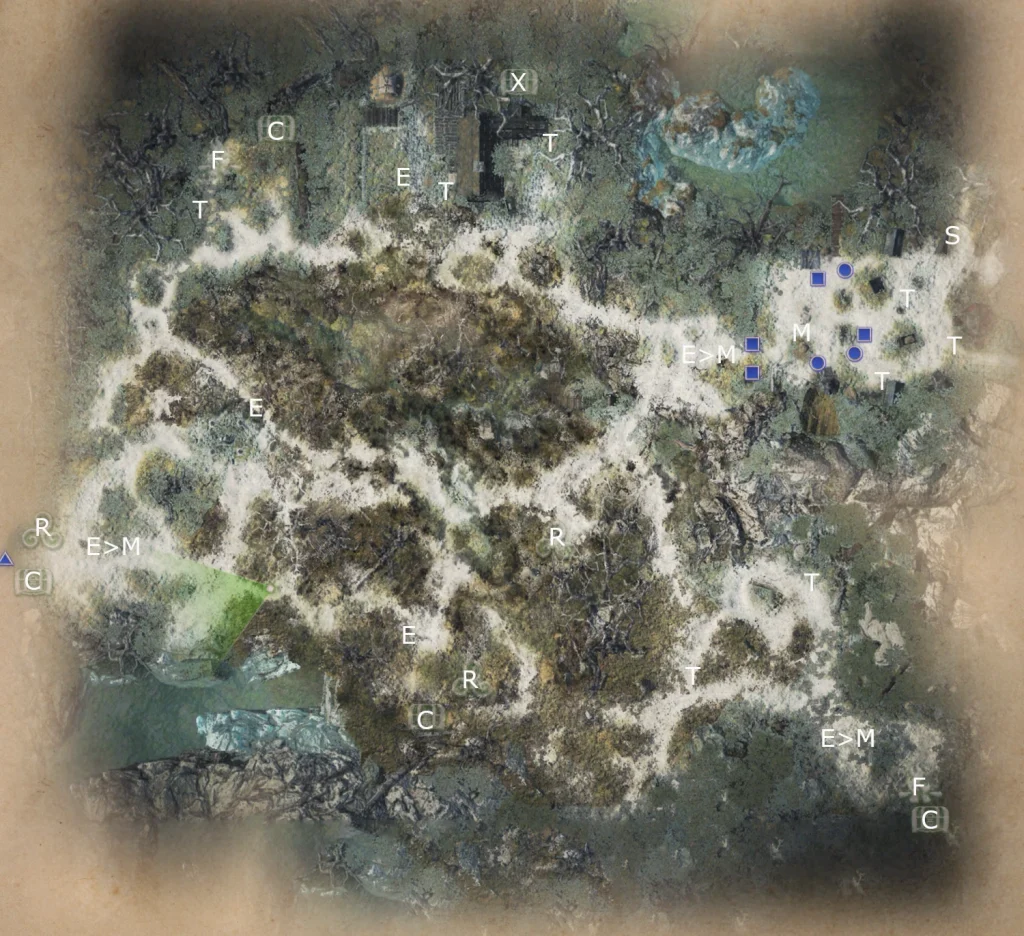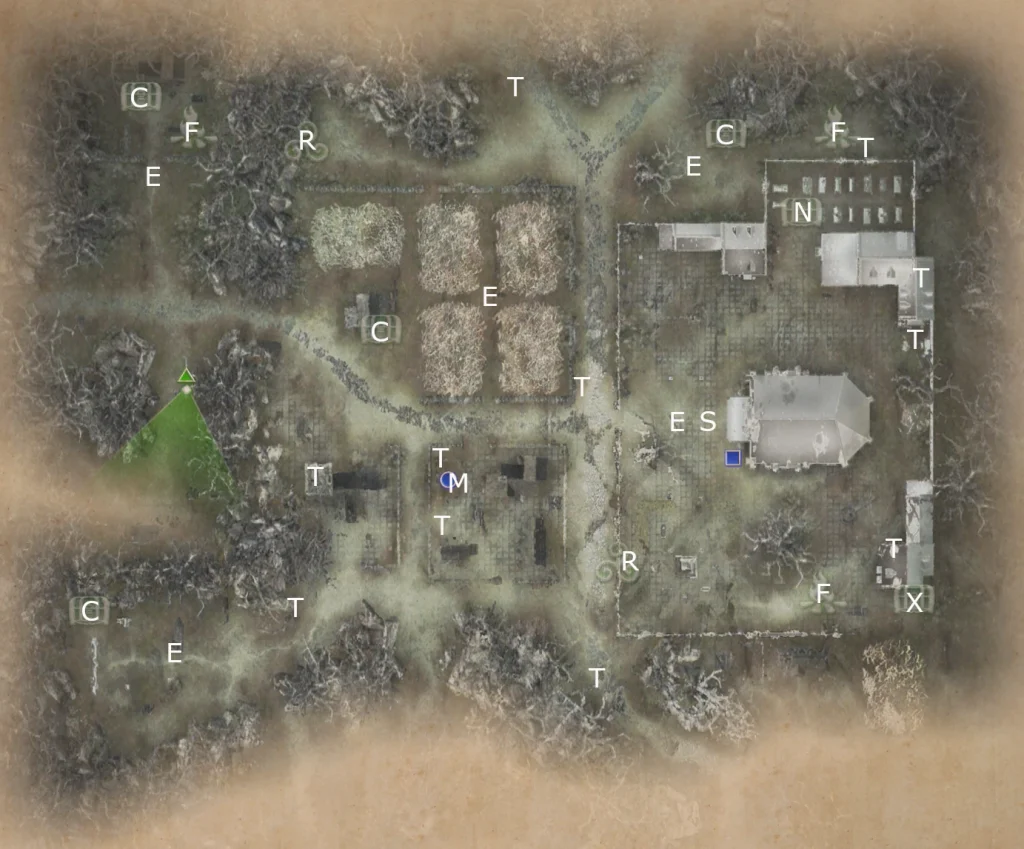
B = battle (between two other groups)
C = chest
E = encounter
F = campfire
H = hero
J1 = jump to J2
K = locked door (needs key)
M = point of interest
N = optional battle
P = traps
R = shrine
S = start
T = treasure pile
X = hidden treasure
Tactical games are usually turn-based and often use a grid for movement.

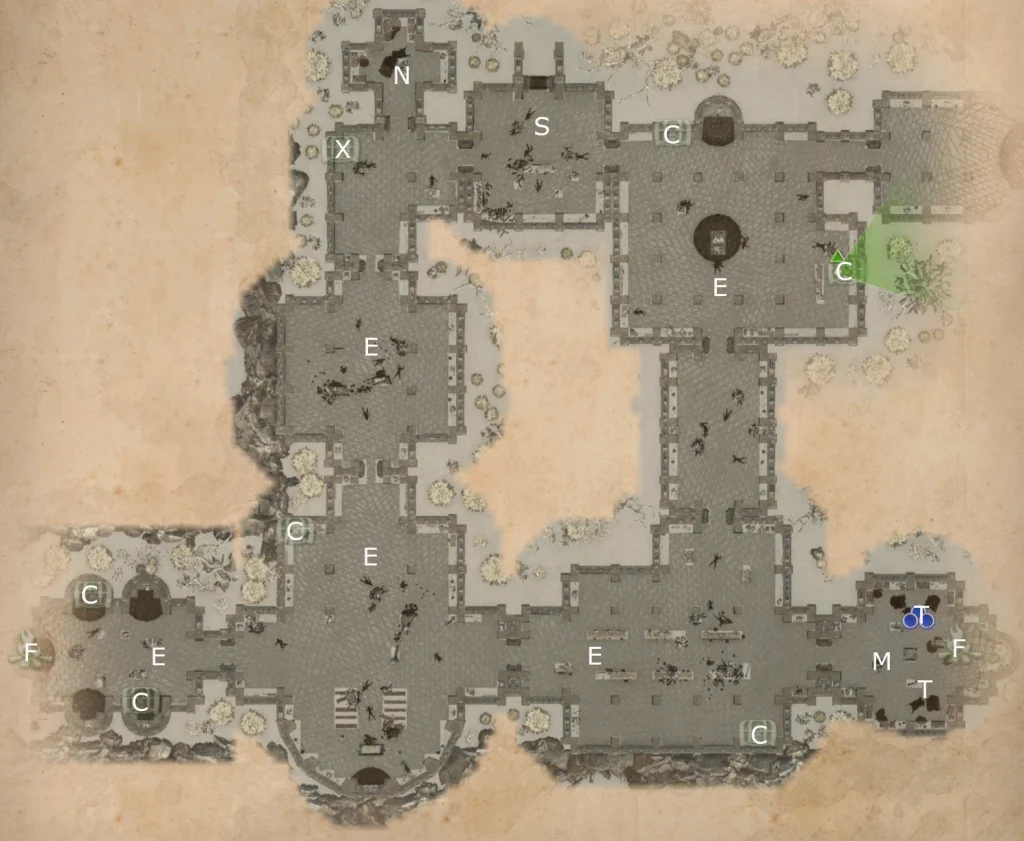
B = battle (between two other groups)
C = chest
E = encounter
F = campfire
H = hero
J1 = jump to J2
K = locked door (needs key)
M = point of interest
N = optional battle
P = traps
R = shrine
S = start
T = treasure pile
X = hidden treasure

These are the heroes available in King Arthur: Knight’s Tale, arranged by morality. The letters preceding the hero’s name are:
Heroes in red or blue font are mutually exclusive, i.e. you cannot have Merlin and Morgawse at the same time.
Building a team with similar moralities helps improved loyalty scores, which affect gameplay. See the top left of the character sheet for details.

B = battle (between two other groups)
C = chest
E = encounter
F = campfire
H = hero
J1 = jump to J2
K = locked door (needs key)
M = point of interest
N = optional battle
P = traps
R = shrine
S = start
T = treasure pile
X = hidden treasure
Seelie priestess will join at start.
Return to King Arthur Knight’s Tale maps

B = battle (between two other groups)
C = chest
E = encounter
F = campfire
H = hero
J1 = jump to J2
K = locked door (needs key)
M = point of interest
N = optional battle
P = traps
R = shrine
S = start
T = treasure pile
X = hidden treasure
Encounter in SW corner can be on the left (EL) or the right (ER).
Return to King Arthur Knight’s Tale maps

B = battle (between two other groups)
C = chest
E = encounter
F = campfire
H = hero
J1 = jump to J2
K = locked door (needs key)
M = point of interest
N = optional battle
P = traps
R = shrine
S = start
T = treasure pile
X = hidden treasure
Hero is Lady Boudicea, who joins. Collecting the numbered points of interest (“M1-3”) will force a battle.
Return to King Arthur Knight’s Tale maps

B = battle (between two other groups)
C = chest
E = encounter
F = campfire
H = hero
J1 = jump to J2
K = locked door (needs key)
M = point of interest
N = optional battle
P = traps
R = shrine
S = start
T = treasure pile
X = hidden treasure
Hero is Faerie Knight, who joins for Mission. After Mission is over, must choose between Faerie Knight and Sir Gawain to join Round Table.
Return to King Arthur Knight’s Tale maps

B = battle (between two other groups)
C = chest
E = encounter
F = campfire
H = hero
J1 = jump to J2
K = locked door (needs key)
M = point of interest
N = optional battle
P = traps
R = shrine
S = start
T = treasure pile
X = hidden treasure
Very long Mission. Hero is Sir Gawain, who joins the Mission. Will also meet the Faerie Knight. Neither join Round Table at this time.
Return to King Arthur Knight’s Tale maps

B = battle (between two other groups)
C = chest
E = encounter
F = campfire
H = hero
J1 = jump to J2
K = locked door (needs key)
M = point of interest
N = optional battle
P = traps
R = shrine
S = start
T = treasure pile
X = hidden treasure
Return to King Arthur Knight’s Tale maps

B = battle (between two other groups)
C = chest
E = encounter
F = campfire
H = hero
J1 = jump to J2
K = locked door (needs key)
M = point of interest
N = optional battle
P = traps
R = shrine
S = start
T = treasure pile
X = hidden treasure
Return to King Arthur Knight’s Tale maps

B = battle (between two other groups)
C = chest
E = encounter
F = campfire
H = hero
J1 = jump to J2
K = locked door (needs key)
M = point of interest
N = optional battle
P = traps
R = shrine
S = start
T = treasure pile
X = hidden treasure
Hero is Sir Bedivere, who joins. Fairly difficult final battle.
Return to King Arthur Knight’s Tale maps